Bedroom area
Heres the short version of the stage one task list:
Bed platform area
- wall lining
- closing right rear windows off in temp fashion.
- platform and partition
- leave ceiling for now, incl aircon.
Feb Work completed
Firstly the floor vinyl in the rear section was lifted (because we want a more or less vinyl free interior). Underneath is 12mm hardwood ply. I spent several hours stripping off the adhesive that remains on the floor.
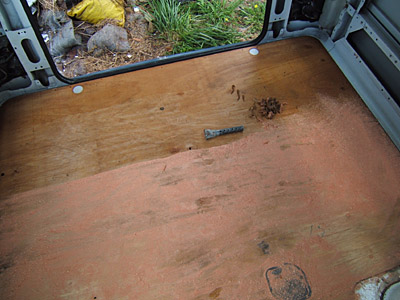
Using mainly a tungsten scraper, I found i needed something for the glue to stick to. Sawdust works well. Keep scraping and brushing. Then soften the remnants with Citrus thinner and wipe residue off.
WIth a couple of coats of organoil, the result looks good enough for a finished floor surface, which is good, seeing as Im trying to maximise floor height. Note however that it does now sound a little more noisy. I`ll reinforce and insulate under the floor later on.
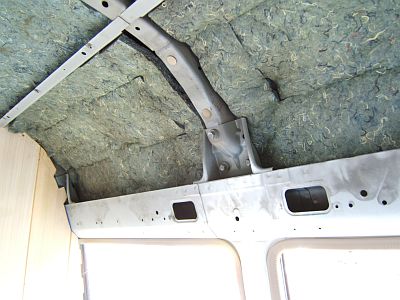
After this i filled the side wall cavities with polyester insulation. It is interesting to note that none of the structual members go all the way through to the skin. The points of contact are little springy clips, with almost no surface area. As a result the insulation can be tucked with patience right into and behind the struts.
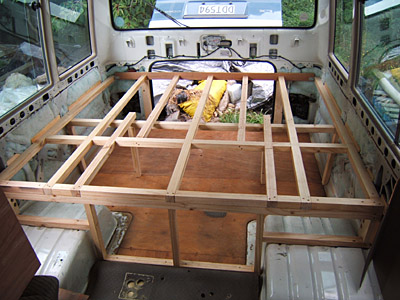
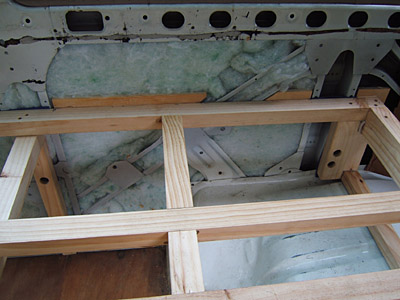
Then a couple of afternoons was spent building a platform out of 40x45mm KD pine clears (good strength to weight ratio). Note the two access hatches.
There are a few bus fittings in this area of note. Just into the bed area is a hatch cover for the fuel tank sender etc. At the very rear of the floor are two round plastic covers that hide major bolts of some kind. The rear vehicle lights that protrude some into the bus, and on the right there are 2 small electronic boxes, and on the left the rear window washer water bottle. I guess most folk would remove the latter.
Two of six attachment points to the buses original seat anchor points. (12mm metric bolts with lock washers). Most of the time is used up making these attachment brackets. Allow 2 hours each... like boats there is a distinct absence of right angles.
Lastly the deck of the platform is 9mm hardwood ply, with two coats of OsColor hardwax oil.
March Work completed
Working weekends, i managed to progress the forward and rear partitions. This turned out to be bit of a mission. Firstly working with TGV sarking is always challenging. Then there are the curves!
This photo shows the tricky most curved part of the bus profile. Most bus fitters cut their losses and build overhead lockers largely to avoid getting too intimate with this curve. Not only is it down to 25cm radius at its tightest, but it also has protruding bolt heads, and a break in the curvature flow between the roof plane and wall plane. Lets see, a picture being worth a thousand words:
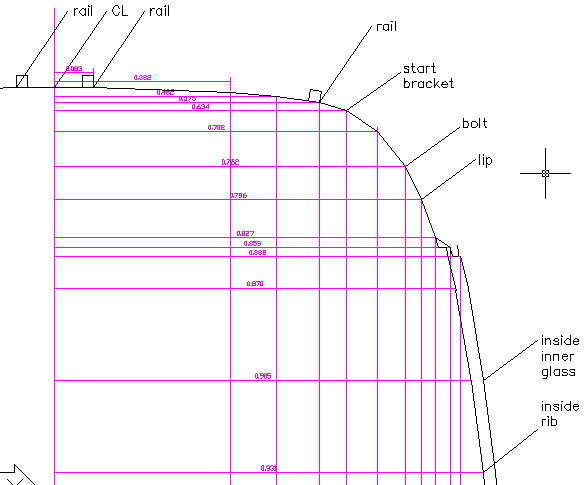
I wanted to avoid overhead lockers to enhance the sense of head height and there are plenty of better places for storage. To deal with the plane change you just use it for the curtain track recess.
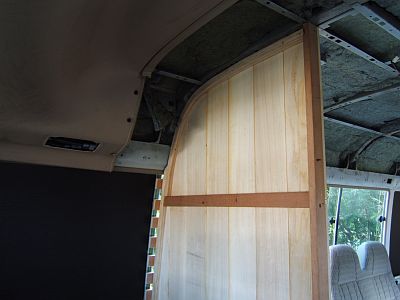
This shows the fitted partition and the 20 x 30 glue lam rib edge.
Using a combination of light and strong materials the result is a 36.5mm thick partitiion, with relatively low weight. The ribs were laminated out of 20mm x 3mm untreated pine slithers. It took a few attempts with piles of broken pine to arrive at the 3mm dimension. A form was made and piles of g clamps.
The actual cross section is 125mm x 10.5mm poplar TGV, 20x40mm hardwood battens, then 6.5mm hardwood ply. The poplar is glued and screwed from the rear, whereas the ply is screwed front on with size 1 squaredrives. The ribs are screwed into the bus body and its incredibly strong feeling. No creaks or squeaks so far. I integrated a small fold down table into the rear partition.
The unwanted windows were painted black (to match the black window trim) Then the plan is to insulate the 28mm cavity with: 15mm airgap + Rfoil +10mm closed cell PE foam. Rfoil should be used with an airgap to be effective. These are the least toxic low form factor insulaters you can get. Normally polystyrene or polyurethane foam are used for thin cavity insulaton, but I got the idea using closed cell PE while snowcaving. Its an awsome insulator with really low offgassing. I tested it with my resident canary.
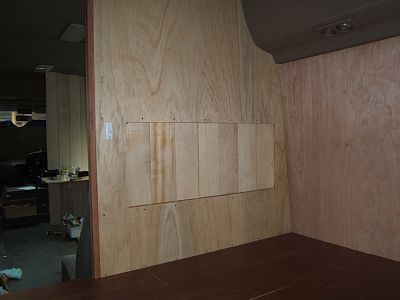
Sidewall lining is to be 4mm hardwood ply, which bends to the sidewall curvature, but wont bend to the roof shape. Its pretty clear ill need 3mm waveply for that.
I replaced the original ceiling lining for now, and badgered the kids into helping stuff more insulation into the living area sidewalls.
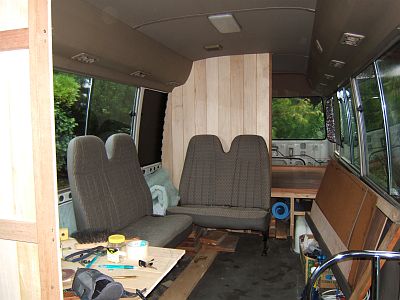
The view looking aft to date.
The next step is the desk ( where the current flimsy mockup is).
- Prev: the plan
- Next: living area
2008-10-25
www.zoneblue.nz/cms/page.php?view=bedroom-area


